Cisco is moving the UC suite to licensing through Enterprise License Manager, or ELM. Currently, Unified Communications Manager and Unity Connection licensing is managed through ELM. IM & Presence is not directly licensed, it is tied to UCM licensing. Other products like Contact Center Express (UCCX) continue to use traditional licensing.
ELM can be run as a co-resident application on UCM or Unity Connection, BE 5000, or BE 6000. It can also be run as a separate server. Cisco recommends a co-resident installation for a single app, and a separate server when running multiple applications, or multiple clusters. Co-resident ELM is supported in any of these configurations, but not recommended.
Co-resident ELM is installed when CUCM or Unity Connection is installed. The stand-alone server is installed from the same media as CUCM and Unity Connection by selecting is in the product to install screen.
We will walk through requesting and apply a demo license, and adding a product instance to ELM.
When you navigate to the IP address or hostname of the server you are running ELM on, you will see the following:
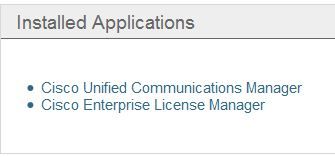
Click “Cisco Enterprise License Manager,” and you get the ELM login.
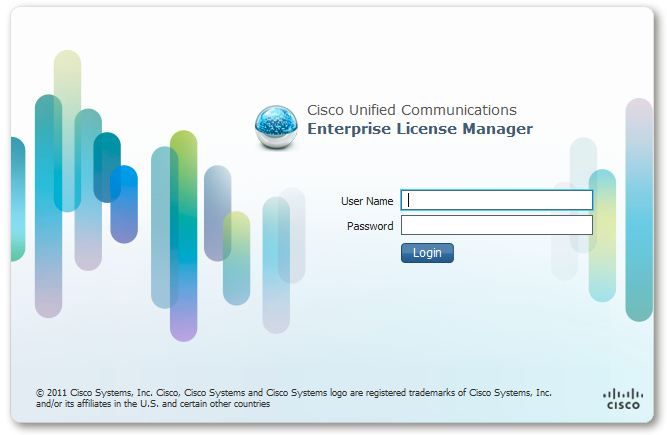
When you log in, you will get the dashboard, which will show that you are in demo mode until you apply licenses. For this demo, we will get a demo license from Cisco, which include 20 CUWL Pro UCM and Unity Connection licenses, as well as 5 Telepresence rooms.
The first step will be to create a license request in ELM, so expand License Management, and click licenses. ELM is able to register PAKs directly from the interface, as well as plan for licenses and generate requests. In this case, we are going to generate a license request, then use it to request the demo license.
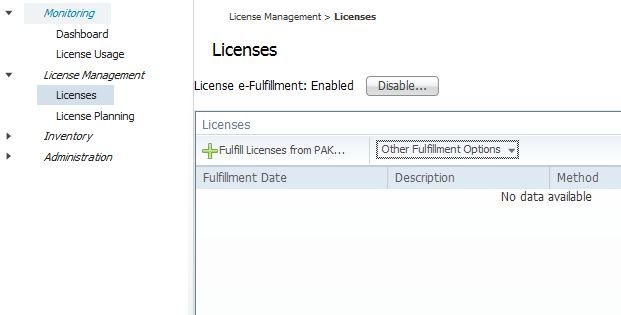
From the licenses screen, select “Other Fulfillment Options,” then “Generate License Request.” The license request window opens.
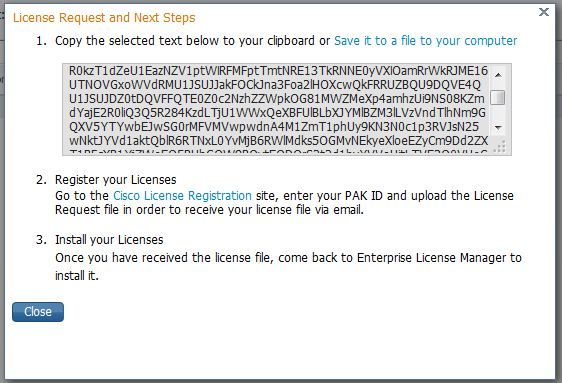
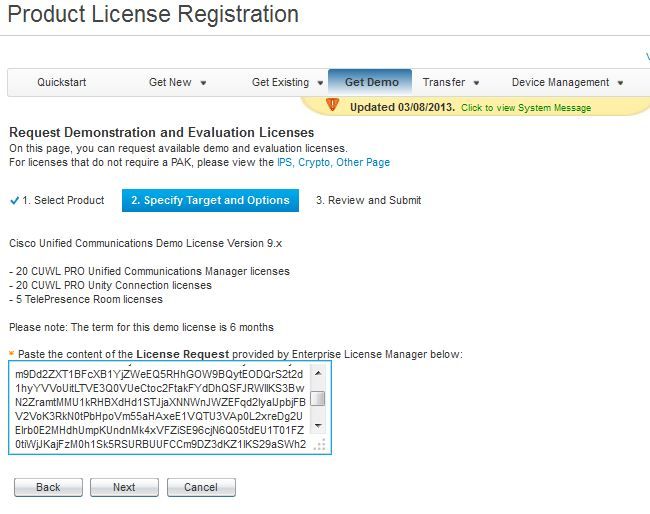
Copy the text to your clipboard, or download it as a file. Next, we will go to www.cisco.com/go/license, click “Get Demo,” then select “Unified Communications Products,” then “Cisco Unified Communications Demo License Version 9.x.” On the next page, paste in the license request text that was copied from your ELM server, and click “Next.”
On the next page, confirm your email address, registration information, and accept the licensing agreement.
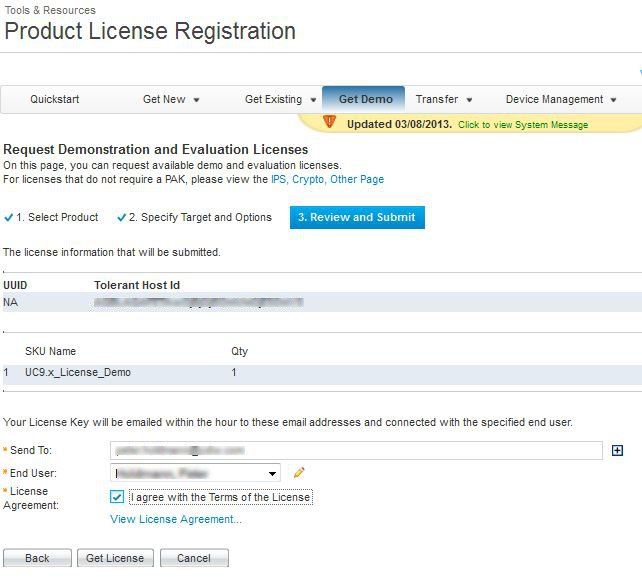
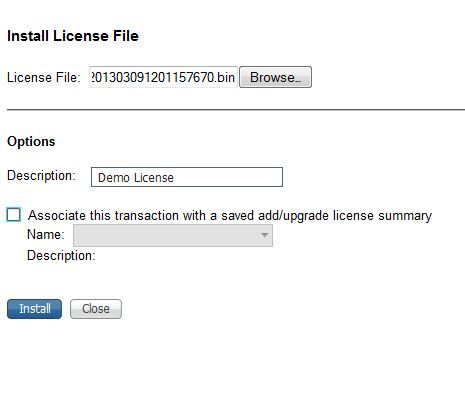
Once you click “Get License,” an email will be sent to you with a zip file attached. Extract the .bin file in the zip file, then go back to the ELM licenses page, and select “Other Fulfillment Options,” then “Fulfill Licenses from File.” Click “Browse,” select the .bin file you downloaded, enter a description if you want, and click “Install.”
Adding a Product Instance to ELM
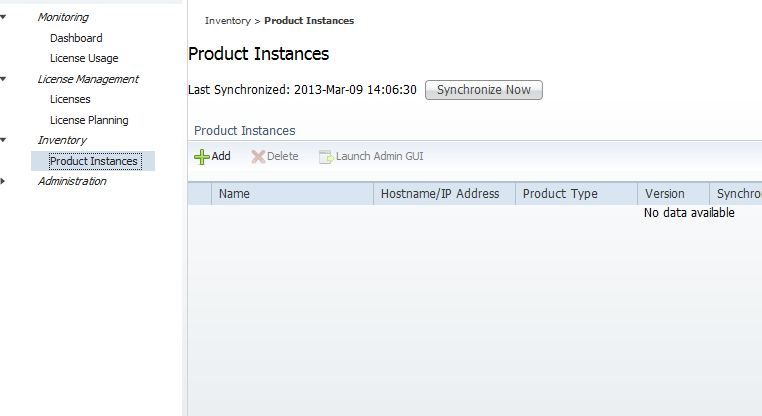
Now we have the license installed, but the applications are not yet using ELM for licensing. To do this, you add a product instance in ELM. Expand “Inventory,” then click “Product Instances.”
When you click “Add,” The Product Add window opens, allowing you to enter a name, description, IP address or hostname, and authentication information for the product instance you want to add.
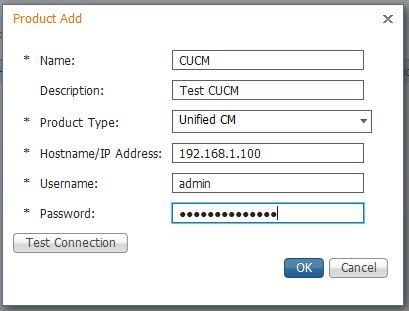
The credentials needed are the platform administrator credentials, the ones used for OS Admin, DRS, etc.
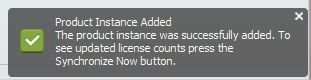
When you click OK, ELM will go out to the server you are adding, and update the server to look to ELM for licensing. Once this is done, the page will inform you it is done.
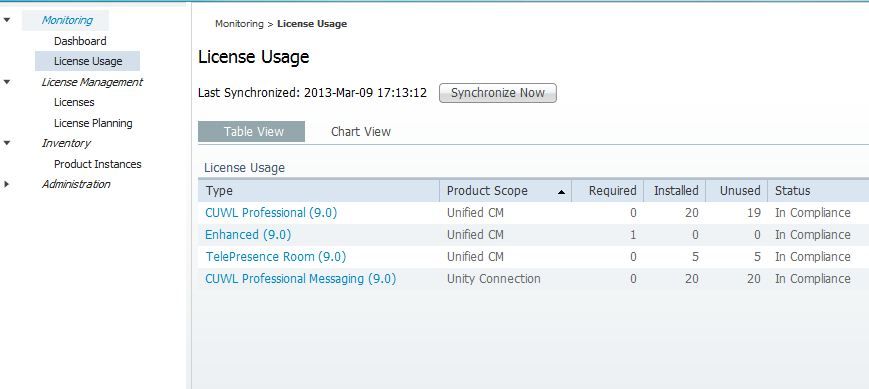
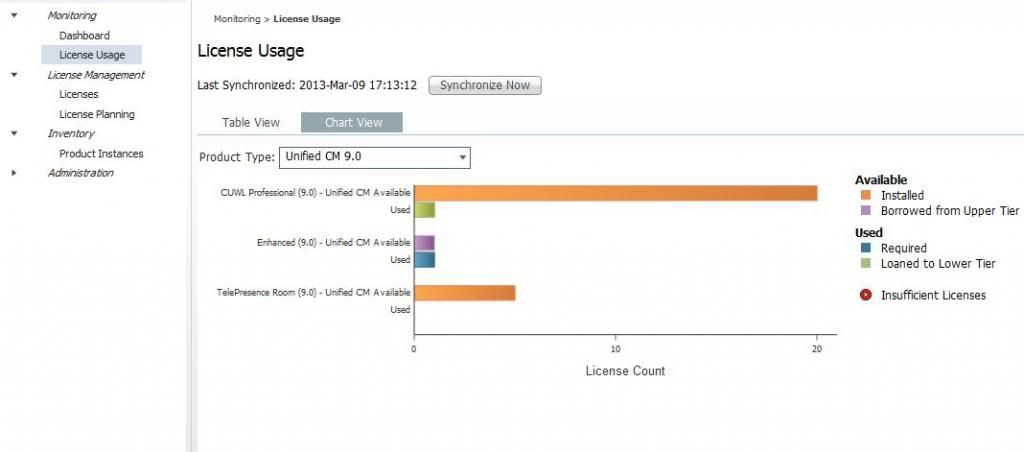
Viewing License Usage in ELM
Once the licenses are synchronized, you can view details of license usage. If licenses at a lower level than those installed are required, the higher level licenses can be borrowed, as seen here. UCM has one user configured, with a single phone, mobility and Presence enabled. This requires an enhanced license, which is “borrowed” from the CUWL Pro licenses that are installed.
Changing the IP address of a server licensed by ELM
One of the benefits of ELM is that you do not need to re-host licenses if you change platform settings, since licensing is no longer tied to a license MAC. However, if you need to change the IP address, you need to follow the proper procedure on ELM. Before you change the IP address, delete the product instance from ELM, follow the proper procedure to update the IP address, and then go through the process to add the product back to ELM. If you do not delete the product instance before updating the IP address, you will get an error adding the instance back into ELM. The fix for this is to run the command “license client reset registration” on the console of the licensed product. Once you run this, the product can be added back into ELM.
Check out the updates for UC 10 Prime License Manager.